单点登录
江南一点雨 ... 2020-04-23 17:18:23 大约 10 分钟
需要先说一下,松哥最近写的教程,都是成系列的,有一些重复的东西写来写去就没意思了,所以每一篇文章都默认大家已经懂了前面的内容了,因此下文有任何看不懂的地方,建议一定先看下相关系列:
Spring Security 系列:
- 挖一个大坑,Spring Security 开搞! (opens new window)
- 松哥手把手带你入门 Spring Security,别再问密码怎么解密了 (opens new window)
- 手把手教你定制 Spring Security 中的表单登录 (opens new window)
- Spring Security 做前后端分离,咱就别做页面跳转了!统统 JSON 交互 (opens new window)
- Spring Security 中的授权操作原来这么简单 (opens new window)
- Spring Security 如何将用户数据存入数据库? (opens new window)
- Spring Security+Spring Data Jpa 强强联手,安全管理只有更简单! (opens new window)
OAuth2 系列:
- 做微服务绕不过的 OAuth2,松哥也来和大家扯一扯 (opens new window)
- 这个案例写出来,还怕跟面试官扯不明白 OAuth2 登录流程? (opens new window)
- 死磕 OAuth2,教练我要学全套的! (opens new window)
- OAuth2 令牌还能存入 Redis ?越玩越溜! (opens new window)
- 想让 OAuth2 和 JWT 在一起愉快玩耍?请看松哥的表演 (opens new window)
- 和大家分享一点微服务架构中的安全管理思路 (opens new window)
好了,开始今天的正文。
单点登录是我们在分布式系统中很常见的一个需求。
分布式系统由多个不同的子系统组成,而我们在使用系统的时候,只需要登录一次即可,这样其他系统都认为用户已经登录了,不用再去登录。前面和小伙伴们分享了 OAuth2+JWT 的登录方式,这种无状态登录实际上天然的满足单点登录的需求,可以参考:想让 OAuth2 和 JWT 在一起愉快玩耍?请看松哥的表演 (opens new window)。
当然大家也都知道,无状态登录也是有弊端的。
所以今天松哥想和大家说一说 Spring Boot+OAuth2 做单点登录,利用 @EnableOAuth2Sso 注解快速实现单点登录功能。
松哥依然建议大家在阅读本文时,先看看本系列前面的文章,这有助于更好的理解本文。
# 1.项目创建
前面的案例中,松哥一直都把授权服务器和资源服务器分开创建,今天这个案例,为了省事,我就把授权服务器和资源服务器搭建在一起(不过相信大家看了前面的文章,应该也能自己把这两个服务器拆分开)。
所以,今天我们一共需要三个服务:
| 项目 | 端口 | 描述 |
|---|---|---|
| auth-server | 1111 | 授权服务器+资源服务器 |
| client1 | 1112 | 子系统1 |
| client2 | 1113 | 子系统2 |
auth-server 用来扮演授权服务器+资源服务器的角色,client1 和 client2 则分别扮演子系统的角色,将来等 client1 登录成功之后,我们也就能访问 client2 了,这样就能看出来单点登录的效果。
我们创建一个名为 oauth2-sso 的 Maven 项目作为父工程即可。
# 2.统一认证中心
接下来我们来搭建统一认证中心。
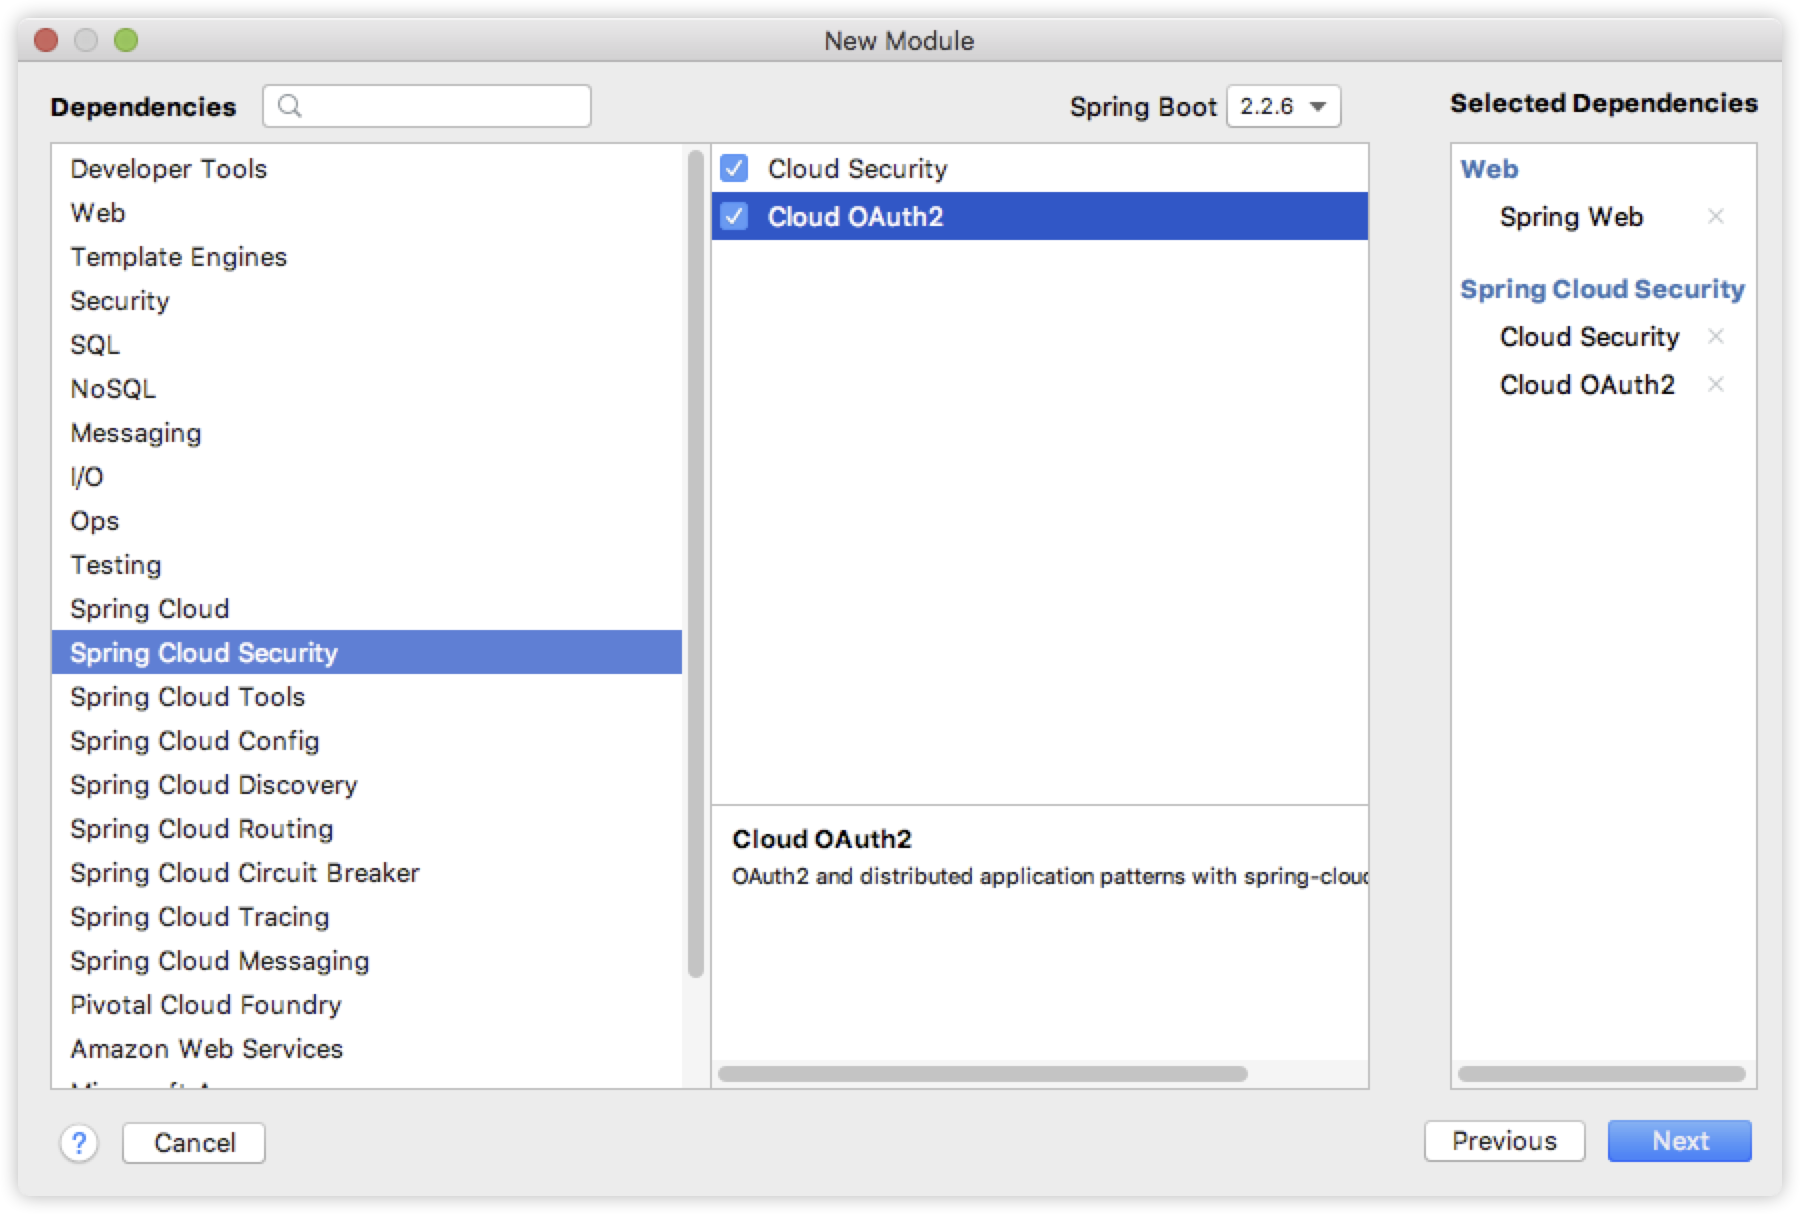
首先我们创建一个名为 auth-server 的 module,创建时添加如下依赖:
项目创建成功之后,这个模块由于要扮演授权服务器+资源服务器的角色,所以我们先在这个项目的启动类上添加 @EnableResourceServer 注解,表示这是一个资源服务器:
@SpringBootApplication
@EnableResourceServer
public class AuthServerApplication {

    public static void main(String[] args) {
        SpringApplication.run(AuthServerApplication.class, args);
    }

}
1
2
3
4
5
6
7
8
9
2
3
4
5
6
7
8
9
接下来我们进行授权服务器的配置,由于资源服务器和授权服务器合并在一起,因此授权服务器的配置要省事很多:
@Configuration
@EnableAuthorizationServer
public class AuthServerConfig extends AuthorizationServerConfigurerAdapter {
    @Autowired
    PasswordEncoder passwordEncoder;

    @Override
    public void configure(ClientDetailsServiceConfigurer clients) throws Exception {
        clients.inMemory()
                .withClient("javaboy")
                .secret(passwordEncoder.encode("123"))
                .autoApprove(true)
                .redirectUris("http://localhost:1112/login", "http://localhost:1113/login")
                .scopes("user")
                .accessTokenValiditySeconds(7200)
                .authorizedGrantTypes("authorization_code");

    }
}
1
2
3
4
5
6
7
8
9
10
11
12
13
14
15
16
17
18
19
2
3
4
5
6
7
8
9
10
11
12
13
14
15
16
17
18
19
这里我们只需要简单配置一下客户端的信息即可,这里的配置很简单,前面的文章也讲过了,大家要是不懂,可以参考本系列前面的文章:这个案例写出来,还怕跟面试官扯不明白 OAuth2 登录流程? (opens new window)。
当然这里为了简便,客户端的信息配置是基于内存的,如果大家想将客户端信息存入数据库中,也是可以的,参考:OAuth2 令牌还能存入 Redis ?越玩越溜! (opens new window)
接下来我们再来配置 Spring Security:
@Configuration
@Order(1)
public class SecurityConfig extends WebSecurityConfigurerAdapter {
    @Bean
    PasswordEncoder passwordEncoder() {
        return new BCryptPasswordEncoder();
    }
    @Override
    public void configure(WebSecurity web) throws Exception {
        web.ignoring().antMatchers("/login.html", "/css/**", "/js/**", "/images/**");
    }

    @Override
    protected void configure(HttpSecurity http) throws Exception {
        http.requestMatchers()
                .antMatchers("/login")
                .antMatchers("/oauth/authorize")
                .and()
                .authorizeRequests().anyRequest().authenticated()
                .and()
                .formLogin()
                .loginPage("/login.html")
                .loginProcessingUrl("/login")
                .permitAll()
                .and()
                .csrf().disable();
    }

    @Override
    protected void configure(AuthenticationManagerBuilder auth) throws Exception {
        auth.inMemoryAuthentication()
                .withUser("sang")
                .password(passwordEncoder().encode("123"))
                .roles("admin");
    }
}
1
2
3
4
5
6
7
8
9
10
11
12
13
14
15
16
17
18
19
20
21
22
23
24
25
26
27
28
29
30
31
32
33
34
35
36
2
3
4
5
6
7
8
9
10
11
12
13
14
15
16
17
18
19
20
21
22
23
24
25
26
27
28
29
30
31
32
33
34
35
36
关于 Spring Security 的配置,如果小伙伴们不懂,可以看看松哥最近正在连载的 Spring Security 系列。
我这里来大致捋一下:
- 首先提供一个 BCryptPasswordEncoder 的实例,用来做密码加解密用。
- 由于我自定义了登录页面,所以在 WebSecurity 中对这些静态资源方形。
- HttpSecurity 中,我们对认证相关的端点放行,同时配置一下登录页面和登录接口。
- AuthenticationManagerBuilder 中提供一个基于内存的用户(小伙伴们可以根据 Spring Security 系列第 7 篇文章自行调整为从数据库加载)。
- 另外还有一个比较关键的地方,因为资源服务器和授权服务器在一起,所以我们需要一个 @Order 注解来提升 Spring Security 配置的优先级。
SecurityConfig 和 AuthServerConfig 都是授权服务器需要提供的东西(如果小伙伴们想将授权服务器和资源服务器拆分,请留意这句话),接下来,我们还需要提供一个暴露用户信息的接口(如果将授权服务器和资源服务器分开,这个接口将由资源服务器提供):
@RestController
public class UserController {
    @GetMapping("/user")
    public Principal getCurrentUser(Principal principal) {
        return principal;
    }
}
1
2
3
4
5
6
7
2
3
4
5
6
7
最后,我们在 application.properties 中配置一下项目端口:
server.port=1111
1
另外,松哥自己提前准备了一个登录页面,如下:
将登录页面相关的 html、css、js 等拷贝到 resources/static 目录下:

这个页面很简单,就是一个登录表单而已,我把核心部分列出来:
<form action="/login" method="post">
    <div class="input">
        <label for="name">用户名</label>
        <input type="text" name="username" id="name">
        <span class="spin"></span>
    </div>
    <div class="input">
        <label for="pass">密码</label>
        <input type="password" name="password" id="pass">
        <span class="spin"></span>
    </div>
    <div class="button login">
        <button type="submit">
            <span>登录</span>
            <i class="fa fa-check"></i>
        </button>
    </div>
</form>
1
2
3
4
5
6
7
8
9
10
11
12
13
14
15
16
17
18
2
3
4
5
6
7
8
9
10
11
12
13
14
15
16
17
18
注意一下 action 提交地址不要写错即可。
文末可以下载源码。
如此之后,我们的统一认证登录平台就算是 OK 了。
# 3.客户端创建
接下来我们来创建一个客户端项目,创建一个名为 client1 的 Spring Boot 项目,添加如下依赖:
项目创建成功之后,我们来配置一下 Spring Security:
@Configuration
@EnableOAuth2Sso
public class SecurityConfig extends WebSecurityConfigurerAdapter {
    @Override
    protected void configure(HttpSecurity http) throws Exception {
        http.authorizeRequests().anyRequest().authenticated().and().csrf().disable();
    }
}
1
2
3
4
5
6
7
8
2
3
4
5
6
7
8
这段配置很简单,就是说我们 client1 中所有的接口都需要认证之后才能访问,另外添加一个 @EnableOAuth2Sso 注解来开启单点登录功能。
接下来我们在 client1 中再来提供一个测试接口:
@RestController
public class HelloController {
    @GetMapping("/hello")
    public String hello() {
        Authentication authentication = SecurityContextHolder.getContext().getAuthentication();
        return authentication.getName() + Arrays.toString(authentication.getAuthorities().toArray());
    }
}
1
2
3
4
5
6
7
8
2
3
4
5
6
7
8
这个测试接口返回当前登录用户的姓名和角色信息。
接下来我们需要在 client1 的 application.properties 中配置 oauth2 的相关信息:
security.oauth2.client.client-secret=123
security.oauth2.client.client-id=javaboy
security.oauth2.client.user-authorization-uri=http://localhost:1111/oauth/authorize
security.oauth2.client.access-token-uri=http://localhost:1111/oauth/token
security.oauth2.resource.user-info-uri=http://localhost:1111/user

server.port=1112

server.servlet.session.cookie.name=s1
1
2
3
4
5
6
7
8
9
2
3
4
5
6
7
8
9
这里的配置也比较熟悉,我们来看一下:
- client-secret 是客户端密码。
- client-id 是客户端 id。
- user-authorization-uri 是用户授权的端点。
- access-token-uri 是获取令牌的端点。
- user-info-uri 是获取用户信息的接口(从资源服务器上获取)。
- 最后再配置一下端口,然后给 cookie 取一个名字。
如此之后,我们的 client1 就算是配置完成了。
按照相同的方式,我们再来配置一个 client2,client2 和 client1 一模一样,就是 cookie 的名字不同(随意取,不相同即可)。
# 4.测试
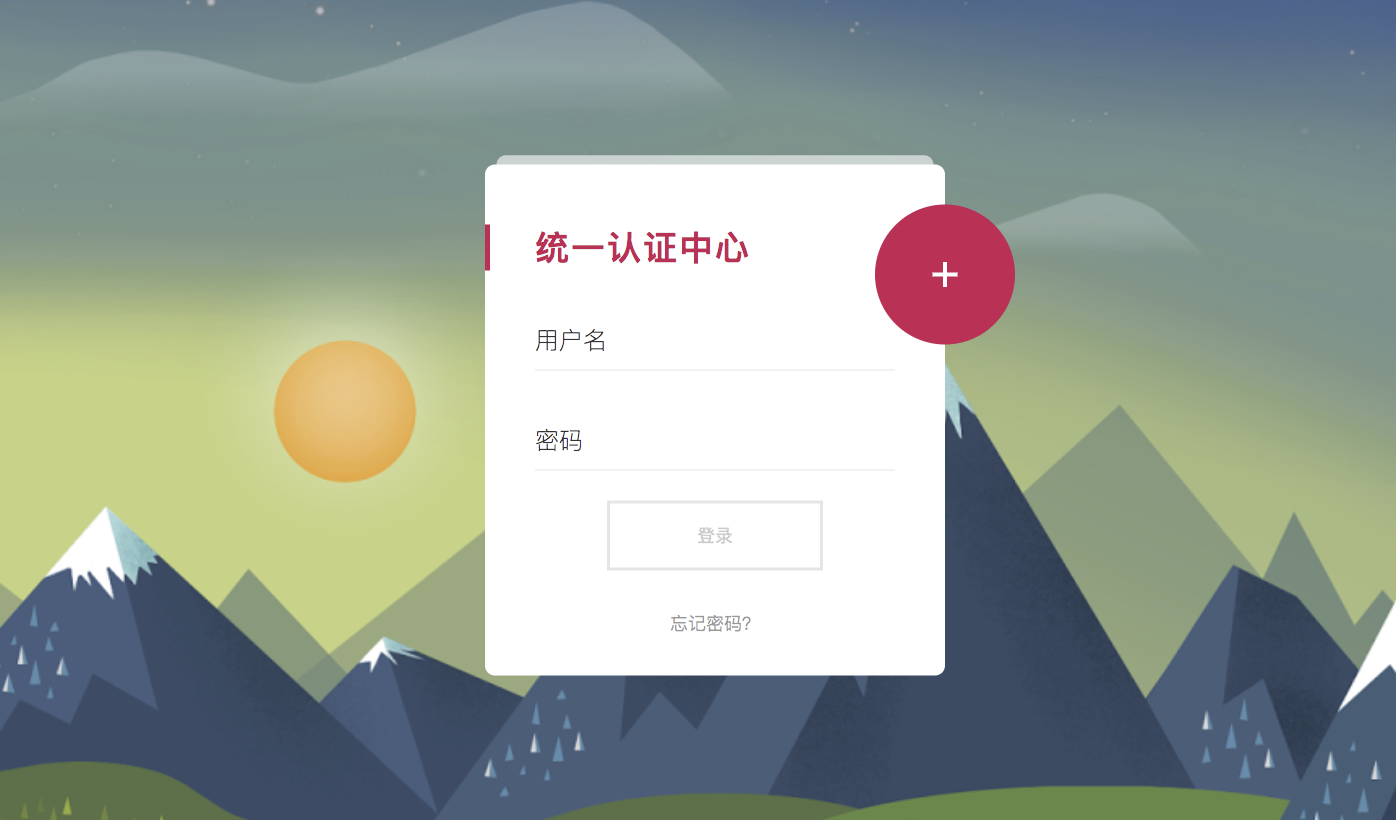
接下来,我们分别启动 auth-server、client1 和 client2,首先我们尝试去方式 client1 中的 hello 接口,这个时候会自动跳转到统一认证中心:
然后输入用户名密码进行登录。
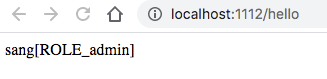
登录成功之后,会自动跳转回 client1 的 hello 接口,如下:
此时我们再去访问 client2 ,发现也不用登录了,直接就可以访问:

OK,如此之后,我们的单点登录就成功了。
# 5.流程解析
最后,我再来和小伙伴们把上面代码的一个执行流程捋一捋:
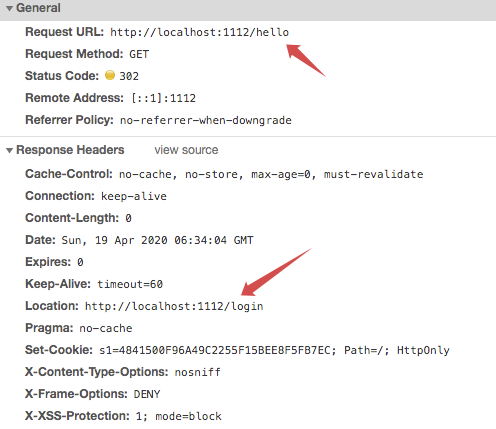
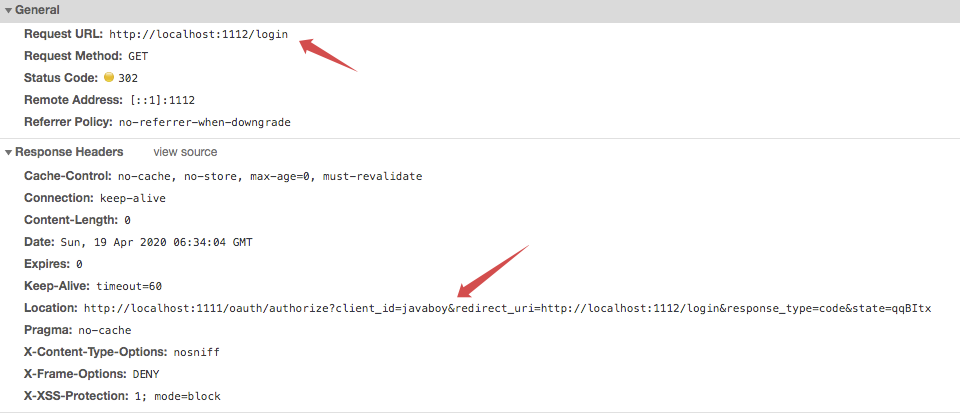
- 首先我们去访问 client1 的 /hello 接口,但是这个接口是需要登录才能访问的,因此我们的请求被拦截下来,拦截下来之后,系统会给我们重定向到 client1 的 /login 接口,这是让我们去登录。
- 当我们去访问 client1 的登录接口时,由于我们配置了 @EnableOAuth2Sso 注解,这个操作会再次被拦截下来,单点登录拦截器会根据我们在 application.properties 中的配置,自动发起请求去获取授权码:
- 在第二步发送的请求是请求 auth-server 服务上的东西,这次请求当然也避免不了要先登录,所以再次重定向到 auth-server 的登录页面,也就是大家看到的统一认证中心。
- 在统一认真中心我们完成登录功能,登录完成之后,会继续执行第二步的请求,这个时候就可以成功获取到授权码了。
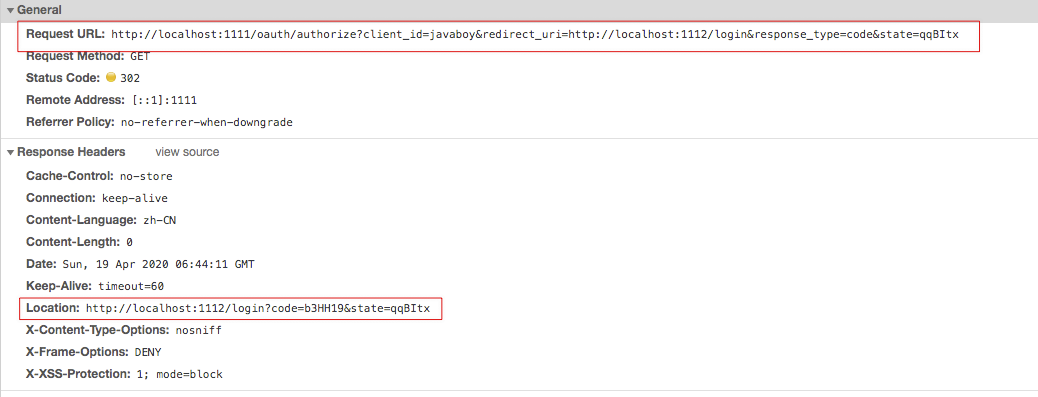
- 获取到授权码之后,这个时候会重定向到我们 client1 的 login 页面,但是实际上我们的 client1 其实是没有登录页面的,所以这个操作依然会被拦截,此时拦截到的地址包含有授权码,拿着授权码,在 OAuth2ClientAuthenticationProcessingFilter 类中向 auth-server 发起请求,就能拿到 access_token 了(参考:这个案例写出来,还怕跟面试官扯不明白 OAuth2 登录流程? (opens new window))。
- 在第五步拿到 access_token 之后,接下来在向我们配置的 user-info-uri 地址发送请求,获取登录用户信息,拿到用户信息之后,在 client1 上自己再走一遍 Spring Security 登录流程,这就 OK 了。
OK,本文和小伙伴们聊了一些 SpringBoot +OAuth2 单点登录的问题,完整案例下载地址:https://github.com/lenve/oauth2-samples (opens new window)
如果小伙伴们觉得有用的话,记得点个在看鼓励下松哥。