上篇文章和小伙伴们说了 Spring 源码中 XML 文件的解析流程,本来可以继续往下走看加载核心类了,但是松哥还是希望能够慢一点,既然要学就学懂,在 XML 文件解析的过程中还涉及到一些其他的类和概念,因此我就先用几篇文章介绍一下这些涉及到的概念或者类,然后我们再继续往下看。
本文要和大家介绍的是上篇文章中涉及到的 EntityResolver 类,看看这个类到底是干嘛用的。
本文是 Spring 源码系列第四篇,阅读前面文章有助于更好理解本文:
先来回顾下,在 EntityResolver 这个类在上篇文章哪里出现了。
我们在讲到 doLoadDocument 方法时,在该方法中调用 loadDocument 方法时,传递的第二个参数就是一个 EntityResolver 实例,当时我们说这个是用来处理文件的验证方式的,但是到底是怎么处理的,今天我们就来看下。
# 1.XML 验证模式
要了解 EntityResolver,就得先来看看 XML 文件验证模式。
现在我们大多数情况下可能都是使用 JSON 传递数据,XML 使用较少,可能有的小伙伴对 XML 文件的一些规则还不太熟悉,我这里稍微说一下。
XML 是指可扩展标记语言(eXtensible Markup Language),它是一种标记语言,类似 HTML;XML 标签没有被预定义,需要用户自行定义标签,也就是 XML 文件中的节点都是用户自定义的。XML 文件从设计之初就是为了传输数据,而非显示数据。
一般来说,一个 XML 文件由六个部分组成:
- 文档生命
- 元素
- 属性
- 注释
- CDATA 区
- 处理指令
虽然说 XML 文件本身是没有预定义 XML 标签,但是当 XML 文件作为框架的配置时,对于 XML 标签还是要有一定的约束,否则每个人都按照自己的喜好定义 XML 标签,框架就没法读取这样的 XML 文件了。
在 XML 技术中,开发者可以通过一个文档来约束一个 XML 的文档中的标签,这个文档称之为约束。遵循 XML 语法的 XML 我们称之为格式良好的 XML,而遵循 XML 约束的 XML 我们称之为有效的 XML。XML 约束文档主要定义了在 XML 中允许出现的元素名称、属性及元素出现的顺序等等。
要想约束 XML 标签,有两种方式:
- DTD
- Schema
DTD(Document Type Definition),全称为文档类型定义,一个 DTD 约束文件我们既可以定义在 XML 文件内部,也可以定义一个本地文件,也可以引用一个网络上的公共的 DTD。
XML Schema 也是一种用于定义和描述 XML 文档结构与内容的模式语言,相比于 DTD,Schema 对于名称空间的支持更加友好,同时也支持更多的数据类型,而且它的约束能力也比较强大,另外还有非常重要的一点是,Schema 文档本身也是 XML 文档,而不是像 DTD 一样使用自成一体的语法。
所以,Schema 目前在 XML 约束这块更具备优势,也在逐渐替代 DTD。
大家在日常开发中,这两种约束可能都见过,但是有的人可能没注意。我给大家简单举一个例子。
早期的 Spring 配置头部是这样的(Spring2.x),这就是 DTD 约束:
<?xml version="1.0" encoding="UTF-8"?>
<!DOCTYPE beans PUBLIC "-//SPRING//DTD BEAN 2.0//EN"
"http://www.springframework.org/dtd/spring-beans-2.0.dtd">
<beans>

</beans>
现在大家看到的 Spring 配置头部一般都是这样,这就是 Schema 约束:
<?xml version="1.0" encoding="UTF-8"?>
<beans xmlns="http://www.springframework.org/schema/beans"
       xmlns:xsi="http://www.w3.org/2001/XMLSchema-instance"
       xmlns:context="http://www.springframework.org/schema/context"
       xsi:schemaLocation="http://www.springframework.org/schema/beans http://www.springframework.org/schema/beans/spring-beans.xsd http://www.springframework.org/schema/context https://www.springframework.org/schema/context/spring-context.xsd">

</beans>
schema 约束对命名空间有着很好的支持,命名空间可以防止命名冲突,schema 中的名称空间和约束文件都是成对出现的。
有了约束,XML 文件中该写什么不该写什么就固定下来了,这样框架才能成功解析出 XML 文件。
但是大家同时也发现了一个新的问题,无论是 DTD 还是 Schema 约束,给出的约束文件地址都是一个在线地址,这就意味着项目启动时必须能够访问到该在线地址,才能加载到约束文件,如果访问在线约束文件失败,那么项目启动也会失败。
为了解决这个问题,框架一般都是将约束文件放在本地的,在本地哪里呢?实际上就在你下载的 jar 包里。以 spring-beans 为例,在下载的 jar 包里有如下两个文件:
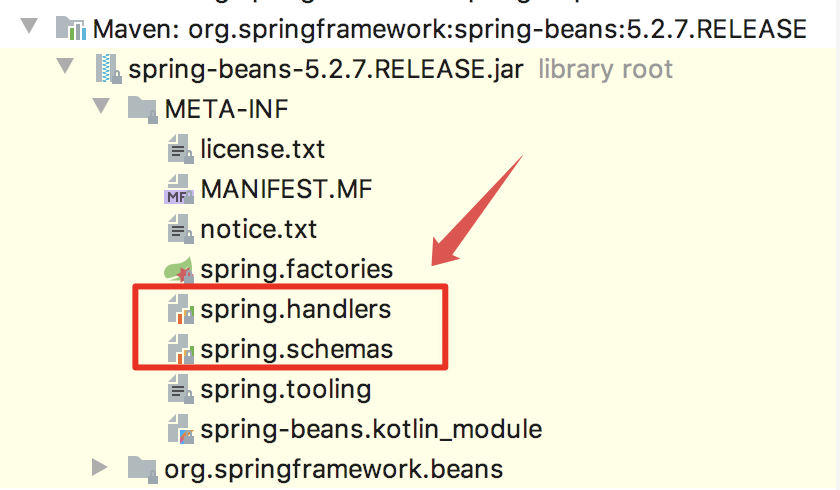
spring.handlers 文件内容如下:
http\://www.springframework.org/schema/c=org.springframework.beans.factory.xml.SimpleConstructorNamespaceHandler
http\://www.springframework.org/schema/p=org.springframework.beans.factory.xml.SimplePropertyNamespaceHandler
http\://www.springframework.org/schema/util=org.springframework.beans.factory.xml.UtilNamespaceHandler
这其实一个映射配置,每一个名称空间对应的处理类在这里进行配置。
spring.schemas 文件内容如下(部分):
http\://www.springframework.org/schema/beans/spring-beans-2.0.xsd=org/springframework/beans/factory/xml/spring-beans.xsd
http\://www.springframework.org/schema/beans/spring-beans-2.5.xsd=org/springframework/beans/factory/xml/spring-beans.xsd
http\://www.springframework.org/schema/beans/spring-beans-3.0.xsd=org/springframework/beans/factory/xml/spring-beans.xsd
http\://www.springframework.org/schema/beans/spring-beans-3.1.xsd=org/springframework/beans/factory/xml/spring-beans.xsd
http\://www.springframework.org/schema/beans/spring-beans-3.2.xsd=org/springframework/beans/factory/xml/spring-beans.xsd
http\://www.springframework.org/schema/beans/spring-beans-4.0.xsd=org/springframework/beans/factory/xml/spring-beans.xsd
http\://www.springframework.org/schema/beans/spring-beans-4.1.xsd=org/springframework/beans/factory/xml/spring-beans.xsd
http\://www.springframework.org/schema/beans/spring-beans-4.2.xsd=org/springframework/beans/factory/xml/spring-beans.xsd
http\://www.springframework.org/schema/beans/spring-beans-4.3.xsd=org/springframework/beans/factory/xml/spring-beans.xsd
http\://www.springframework.org/schema/beans/spring-beans.xsd=org/springframework/beans/factory/xml/spring-beans.xsd
可以看到,各种版本以及没有版本号的约束文件,都对应了同一个文件,就是 org/springframework/beans/factory/xml/spring-beans.xsd,打开这个文件目录,我们就可以看到约束文件:
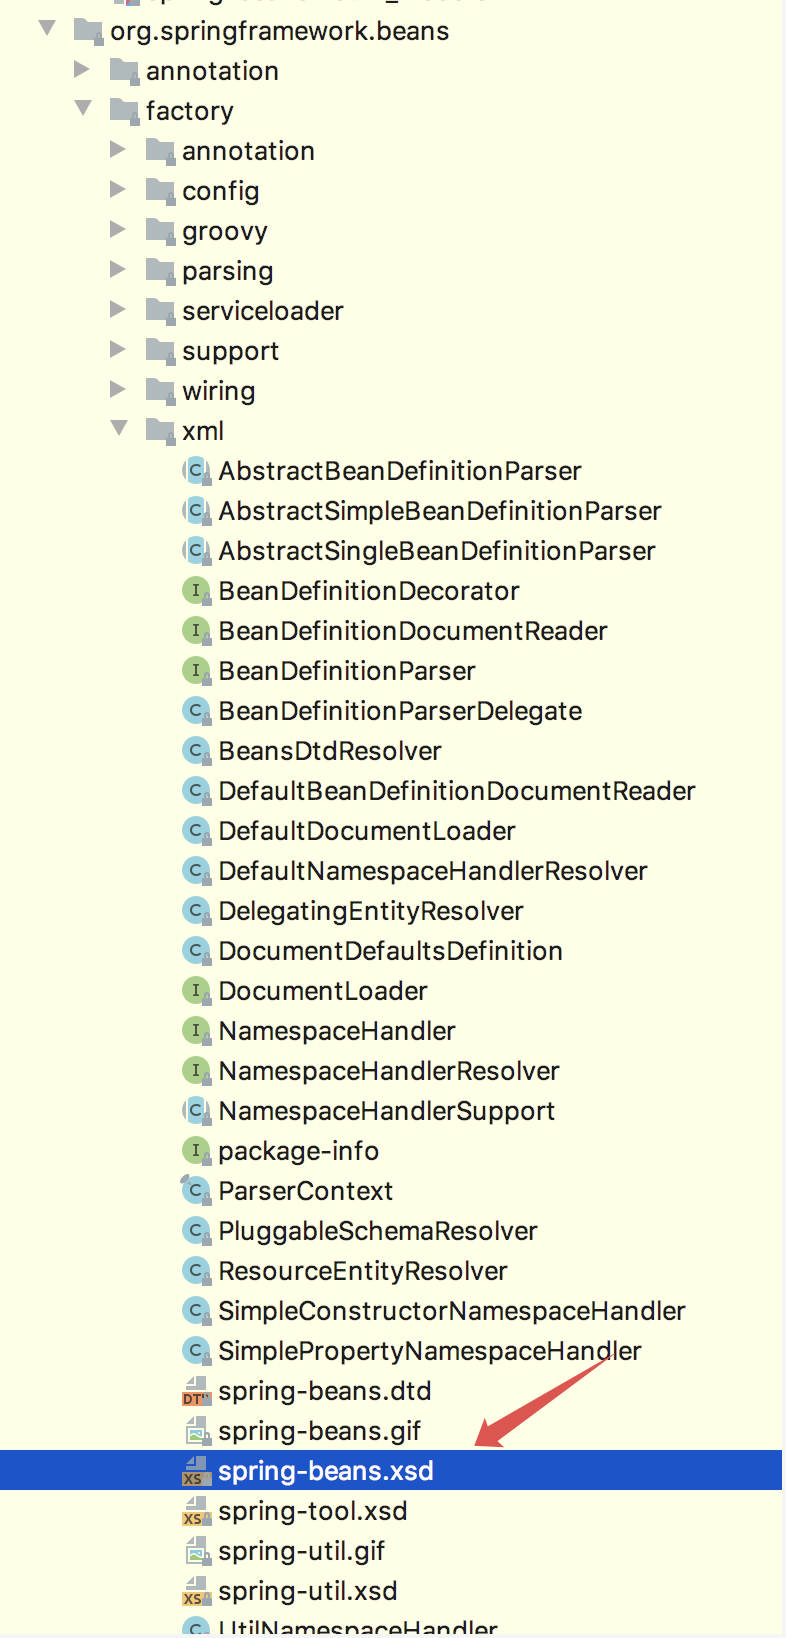
所以我们虽然在 Spring 的 XML 配置中看到的约束文件是一个在线地址,实际上约束文件是从本地 jar 中读取的。
# 2.两种解析器
EntityResolver 就是用来处理 XML 验证的。我们先来看下 EntityResolver 接口的定义:
public interface EntityResolver {
    public abstract InputSource resolveEntity (String publicId,
                                               String systemId)
        throws SAXException, IOException;

}
接口中就只有一个方法,就是加载约束文件。在 Spring 中,EntityResolver 的实现类是 DelegatingEntityResolver:
public class DelegatingEntityResolver implements EntityResolver {
	public static final String DTD_SUFFIX = ".dtd";
	public static final String XSD_SUFFIX = ".xsd";
	private final EntityResolver dtdResolver;
	private final EntityResolver schemaResolver;
	public DelegatingEntityResolver(@Nullable ClassLoader classLoader) {
		this.dtdResolver = new BeansDtdResolver();
		this.schemaResolver = new PluggableSchemaResolver(classLoader);
	}
	public DelegatingEntityResolver(EntityResolver dtdResolver, EntityResolver schemaResolver) {
		this.dtdResolver = dtdResolver;
		this.schemaResolver = schemaResolver;
	}
	@Override
	@Nullable
	public InputSource resolveEntity(@Nullable String publicId, @Nullable String systemId)
			throws SAXException, IOException {
		if (systemId != null) {
			if (systemId.endsWith(DTD_SUFFIX)) {
				return this.dtdResolver.resolveEntity(publicId, systemId);
			}
			else if (systemId.endsWith(XSD_SUFFIX)) {
				return this.schemaResolver.resolveEntity(publicId, systemId);
			}
		}
		return null;
	}
	@Override
	public String toString() {
		return "EntityResolver delegating " + XSD_SUFFIX + " to " + this.schemaResolver +
				" and " + DTD_SUFFIX + " to " + this.dtdResolver;
	}
}
在 DelegatingEntityResolver 类中:
- 首先通过两种不同的后缀来区分不同的约束。
- 然后定义了 dtdResolver 和 schemaResolver 两个不同的变量,对应的类型分别是 BeansDtdResolver 和 PluggableSchemaResolver,也就是 dtd 和 schema 的约束验证分别由这两个类来处理。
- 在 resolveEntity 方法中,根据解析出来不同的后缀,分别交由不同的 EntityResolver 来处理。resolveEntity 解析中有两个参数,如果是 dtd 解析的话,publicId 是有值的,如果是 schema 解析,publicId 为 null,而 systemId 则始终指向具体的约束文件。
由于现在大部分都是 schema 约束,所以这里我们就来重点看下 PluggableSchemaResolver 类的实现:
public class PluggableSchemaResolver implements EntityResolver {
	public static final String DEFAULT_SCHEMA_MAPPINGS_LOCATION = "META-INF/spring.schemas";
	private static final Log logger = LogFactory.getLog(PluggableSchemaResolver.class);
	@Nullable
	private final ClassLoader classLoader;
	private final String schemaMappingsLocation;
	@Nullable
	private volatile Map<String, String> schemaMappings;
	public PluggableSchemaResolver(@Nullable ClassLoader classLoader) {
		this.classLoader = classLoader;
		this.schemaMappingsLocation = DEFAULT_SCHEMA_MAPPINGS_LOCATION;
	}
	public PluggableSchemaResolver(@Nullable ClassLoader classLoader, String schemaMappingsLocation) {
		Assert.hasText(schemaMappingsLocation, "'schemaMappingsLocation' must not be empty");
		this.classLoader = classLoader;
		this.schemaMappingsLocation = schemaMappingsLocation;
	}
	@Override
	@Nullable
	public InputSource resolveEntity(@Nullable String publicId, @Nullable String systemId) throws IOException {
		if (logger.isTraceEnabled()) {
			logger.trace("Trying to resolve XML entity with public id [" + publicId +
					"] and system id [" + systemId + "]");
		}
		if (systemId != null) {
			String resourceLocation = getSchemaMappings().get(systemId);
			if (resourceLocation == null && systemId.startsWith("https:")) {
				resourceLocation = getSchemaMappings().get("http:" + systemId.substring(6));
			}
			if (resourceLocation != null) {
				Resource resource = new ClassPathResource(resourceLocation, this.classLoader);
				try {
					InputSource source = new InputSource(resource.getInputStream());
					source.setPublicId(publicId);
					source.setSystemId(systemId);
					if (logger.isTraceEnabled()) {
						logger.trace("Found XML schema [" + systemId + "] in classpath: " + resourceLocation);
					}
					return source;
				}
				catch (FileNotFoundException ex) {
					if (logger.isDebugEnabled()) {
						logger.debug("Could not find XML schema [" + systemId + "]: " + resource, ex);
					}
				}
			}
		}
		return null;
	}
	private Map<String, String> getSchemaMappings() {
		Map<String, String> schemaMappings = this.schemaMappings;
		if (schemaMappings == null) {
			synchronized (this) {
				schemaMappings = this.schemaMappings;
				if (schemaMappings == null) {
					try {
						Properties mappings =
								PropertiesLoaderUtils.loadAllProperties(this.schemaMappingsLocation, this.classLoader);
						schemaMappings = new ConcurrentHashMap<>(mappings.size());
						CollectionUtils.mergePropertiesIntoMap(mappings, schemaMappings);
						this.schemaMappings = schemaMappings;
					}
					catch (IOException ex) {
						throw new IllegalStateException(
								"Unable to load schema mappings from location [" + this.schemaMappingsLocation + "]", ex);
					}
				}
			}
		}
		return schemaMappings;
	}
	@Override
	public String toString() {
		return "EntityResolver using schema mappings " + getSchemaMappings();
	}
}
- 在这个类中,一上来先通过 DEFAULT_SCHEMA_MAPPINGS_LOCATION 变量定义了 spring.schemas 文件的位置。
- getSchemaMappings 方法则是将 spring.schemas 文件中的内容读取成一个 Map 加载进来。
- 在 resolveEntity 方法中,根据 systemId 找到文件路径,systemId 是
http\://www.springframework.org/schema/beans/spring-beans.xsd格式,文件路径则是org/springframework/beans/factory/xml/spring-beans.xsd,如果第一次没有加载到,就把用户的https:替换成http:再去加载。 - 有了文件路径,接下来调用 ClassPathResource 去获取一个 Resource 对象,这块可以参考本系列第二篇,这里我就不再赘述。
- 最后构造一个 InputSource 返回即可。
在上篇文章中,我们获取 EntityResolver 是通过 getEntityResolver 方法来获取的:
protected EntityResolver getEntityResolver() {
	if (this.entityResolver == null) {
		// Determine default EntityResolver to use.
		ResourceLoader resourceLoader = getResourceLoader();
		if (resourceLoader != null) {
			this.entityResolver = new ResourceEntityResolver(resourceLoader);
		}
		else {
			this.entityResolver = new DelegatingEntityResolver(getBeanClassLoader());
		}
	}
	return this.entityResolver;
}
这里最终返回的是 ResourceEntityResolver,ResourceEntityResolver 继承自 DelegatingEntityResolver,当调用 resolveEntity 方法时,也是先调用父类的该方法,进行处理,如果父类方法处理成功了,就直接返回父类方法给出的结果,如果父类方法处理失败了,则在 ResourceEntityResolver 中通过资源的相对路径再次尝试加载。
# 3.小结
好啦,经过上面的介绍,相信大家对于 XMl 约束和 EntityResolver 都有一定的了解啦。
后记
本文刚写完,微信群里就有小伙伴问了一个一模一样的问题:
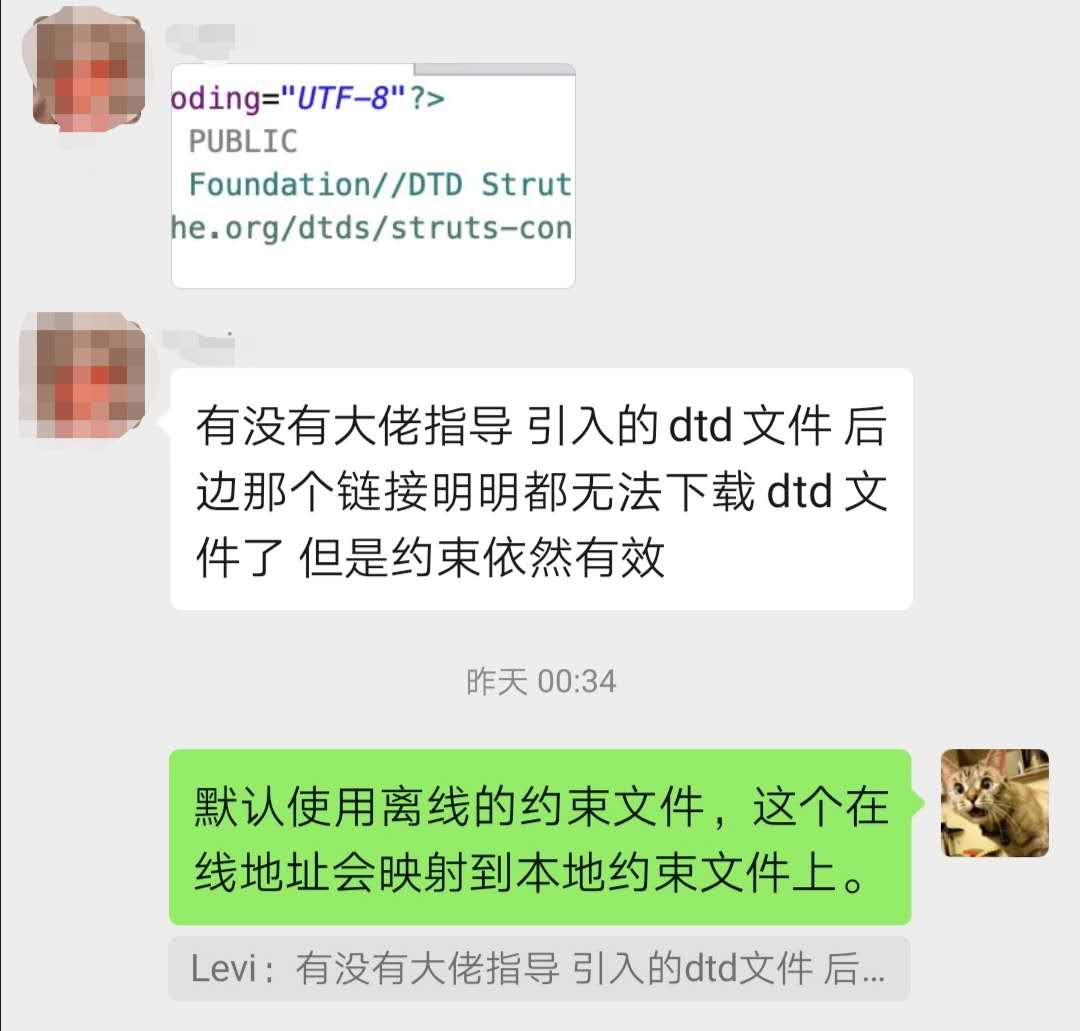
松哥不禁感叹,源码并非离我们很远的东西,阅读源码可以有效解决我们日常开发中一些实实在在的问题!
如果觉得有收获,记得点个在看鼓励下松哥哦~